Gatsby is a free, open-source framework for building websites and applications. It’s extremely developer-friendly and streamlines the setup and configuration of your build. Gatsby can pull data into your UI from any and all of the sources you currently use; and exceptional performance, added security, and current web best practices are built into Gatsby.
Gatsby Starter (with Typescript)
1.Install dependencies

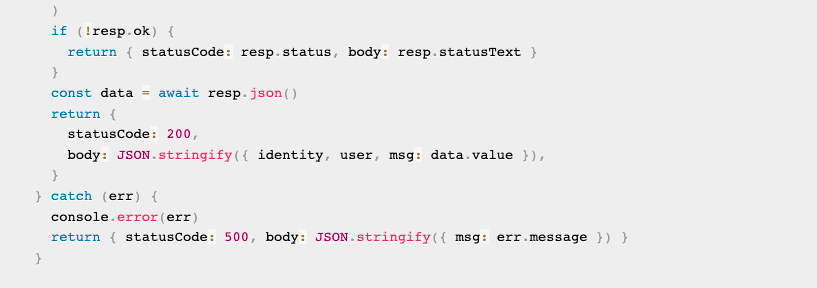
gatsby-plugin-typescript is automatically included in Gatsby. Only explicitly use this plugin if you need to configure its options.2. Configure Typescript options
Continuously Build and Deploy Site on Netlify
Netlify is a great platform for deploying Gatsby sites and setting up continues development using Git triggered builds. Their free-tier package includes unlimited projects, HTTPS and continuous development from public or private repositories of GitHub, GitLab and BitBucket.
Trigger builds from changes in code base
After creating your gatsby site from either
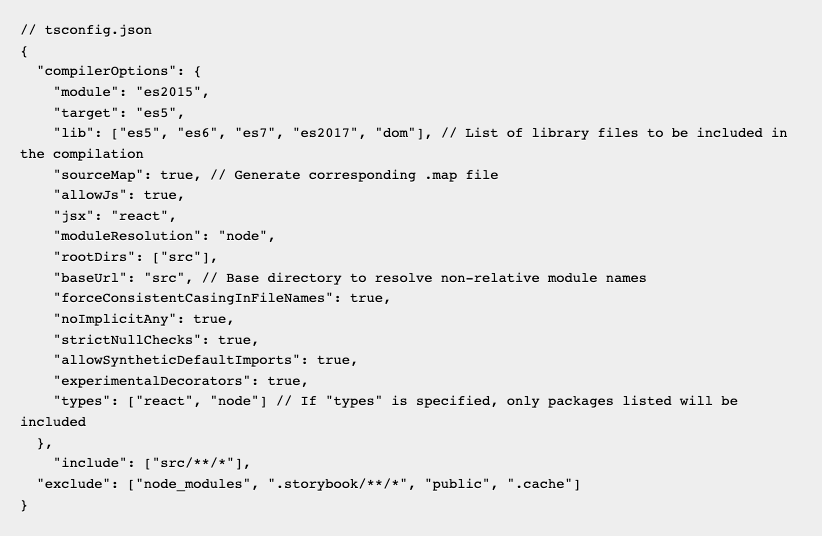
gatsby-cli(gatsby new gatsby-site) or one of the many flavored starters, create a Git repo and push all local changes to remote. Then follow the instructions to link your repo in Netlify Console after you have authorized Netlify through Github account (or other platform of your choosing). One thing worth noting is that Netlify allows you to deploy multiple branches. This comes useful when you have both production and staging environment.
Screenshot of Netlify Console
Production branch is the Git branch Netlify uses to build and deploy changes to the site's main URL. Branch deploy is generated from the designated branch (in this case,
master, set up as staging branch) and deployed to branchname--yoursitename.netlify.app.Trigger builds from changes in data source
When a portion of the site data is sourced from content management systems like DatoCMS, it is crucial to set up build hooks, so when an change event occurs, an automatic deploy is triggered on your staging and production environments.
Go to Settings > Build & deploy > Build hooks section of Netlify Console, add a new build hook generates a unique URL you can use to trigger a build. Copy and paste that URL to DatoCMS dashboard (see below) and Voilà! This way when you also enable draft/published system on a model, changes made to records won't be immediately published but instead put in draft and only available in staging environment.

Editing DatoCMS Webhook
Runtime vs. Build Time
Before we dive into the data layers, let's talk about the difference between "runtime" and "build time" in Gatsby for a moment here: Runtime is when static pages are opened in the browser. Running
gatsby develop spins up browser for you, meaning you can make reference to the window object without triggering any error. Running gatsby build will generate optimized assets, however, the browser does not exist in build time so using "browser globals" like window or ducument object without first checking its existence will trigger a build error. To fix this, either check if the browser globals are defined; or, if the code is in render function of a React JS component, move that code to a componentDidMount() lifecycle method / useEffect hook.Sourcing Data with plugins, Querying Data with GraphQL
BYOD (Bring-Your-Own-Data)
Data sourcing in Gatsby is plugin-driven. Source plugins fetch data from the file system (
gatsby-source-filesystem plugin), Databases (gatsby-source-mongodb plugin), Headless CMS (gatsby-source-datocms, which we will be using in the example), and so on.After installing the plugin, configure it in
gatsby-config.js file: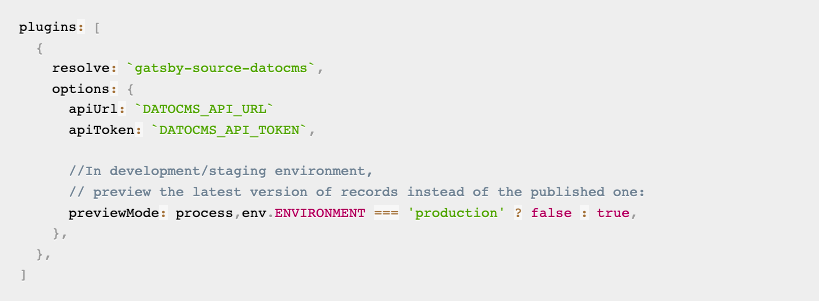
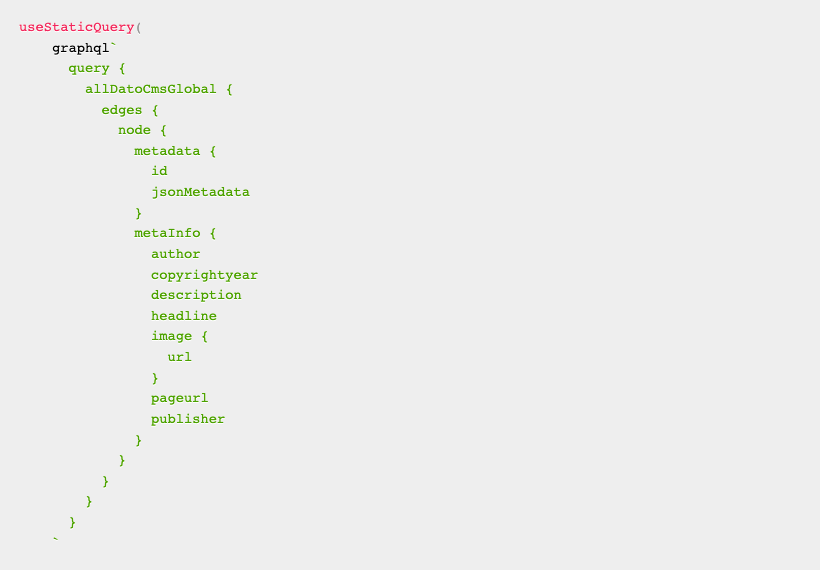
The really novel idea: GraphQL at build time
GraphQL queries are parsed, then injected into React components at build time, eventually rendered as HTML static contents. Data can be queried inside pages, components or
gatsby-node.js file using pageQuery component, StaticQuery component, or useStaticQuery hook. However, you cannot mix page queries and static queries in the same file, or have multiple page queries/static queries.A query example in GraphQL schema:
Gatsby Is Not Just for Static Site
React Hydration makes "app-like" features possible
Even though Gatsby is generally labeled as a "static site generator", it is fully equipped to build a dynamic application with baked in server side pre-rendering. All Gatsby pages are hydrated into React behind the scene:
ReactDOM.hydrate() is called internally by Gatsby from ReactDOM. The method is the same as render() but is used to hydrate HTML contents initially rendered by ReactDOMServer. This allows for React to pick up whatever is left after static site generation, then you can do your dynamic data fetching at runtime.-
Static pages
- Automatically create pages throught
src/pages - Programmatically with
createPageAPI
- Automatically create pages throught
- Hybrid app pages Statically created pages can make calls to external services and third party APIs for dynamic data-fetching. These pages are referred as hybrid app pages.
- Client only routes Using a client-side router such as
react-routeror@reach-router(@reach-router is what Gatsby uses behind the scene, so no need to install it), you can create page by exporting a component inside pages directory, or import a router and set up routes yourself.
Expand Site To Be Even More Dynamic
Add Netlify Functions to Gatsby
Even though you can achieve dynamic data fetching by making requests in app components, sometimes it is desired to hide your third party API secrets, or maybe you want to access your database. Gatsby is flexible enough to attach serverless functions to do these at east.
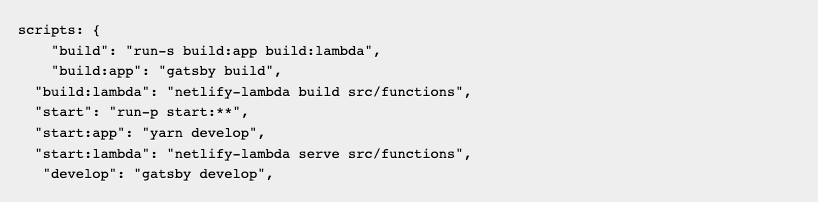
1. Install dependencies

2. Configure Netlify build, have a functions path in
netlify.toml file at the root of your repository3. Write scripts When deploying to Netlify,
gatsby build must be run before netlify-lambda build src/functions or else the Netlify function builds will fail.
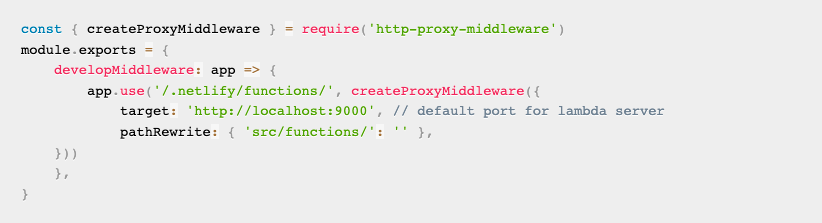
4. Proxy the functions in local development, to avoid CORS error
5. Write your functiosn in
/src/functions (path specified in netlify.toml file), then access from your Gatsby app like this: fetch('/.netlify/functions/[YOUR_FILE_NAME]').then(() => ())6. Setting environment variables in
netlify.toml fileAdd Authentication in Gatsby
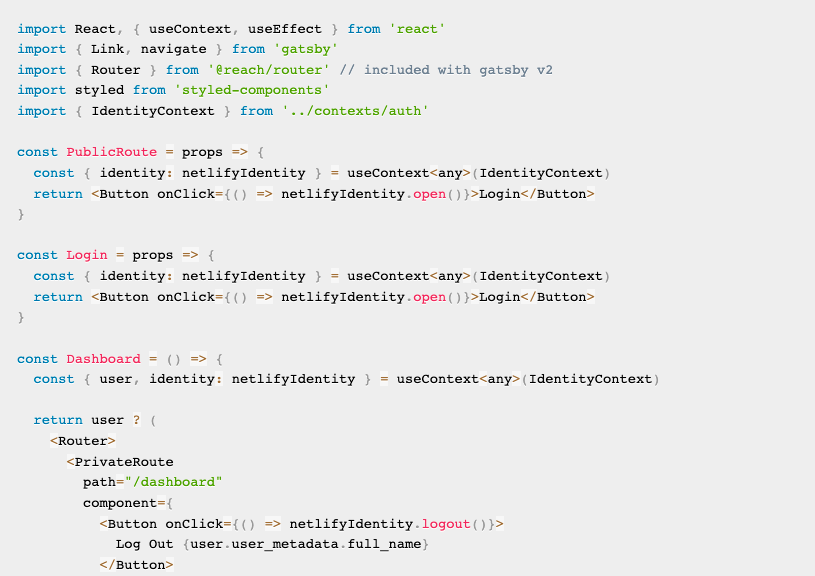
- Gatsby statically renders all unprotected routes as usual
- Authenticated routes are whitelisted as client-only, wrapped in an authentication provider
- Logged out users are redirected to the login page when they attempt to visit a protected route
- Logged in users will see their private content
Use Netlify Identiy
Netlify's Identity service is a microservice for handling sighups, logins, password recovery, user metadata and roles. It can be integrated with any service understands JSON Web Tokens.
1. Go to Netlify Console to enable identity
2. Install dependencies

3. Config plugin: any route under
/dashboard will be handled by client-side app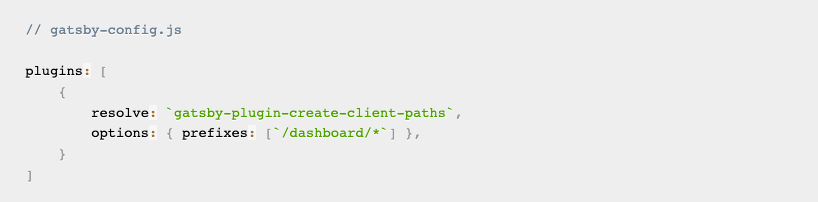
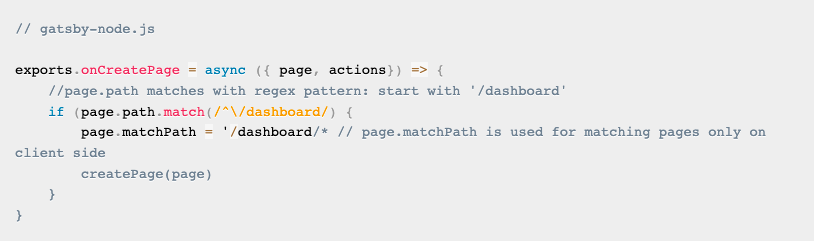
This is the same with implementing the Gatsby API onCreatePage(). onCreatePage() is called after every page is created.
4. Create an identity context to share logic across pages
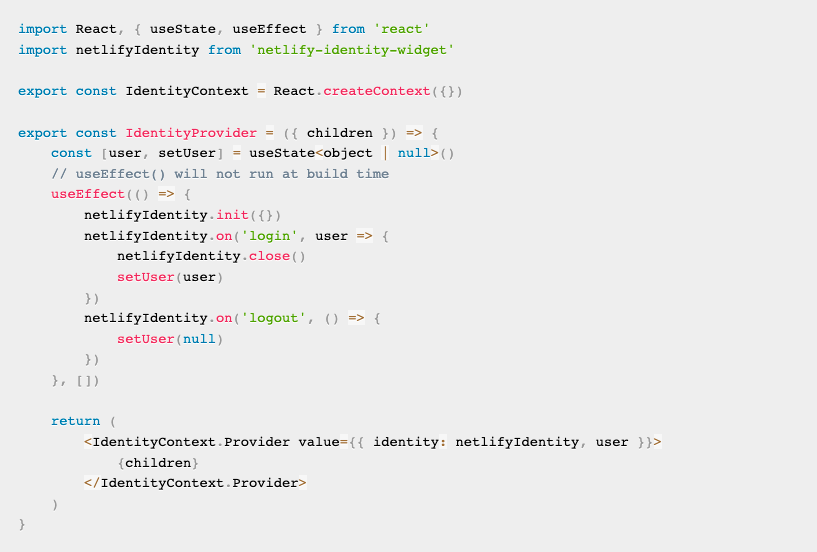
5. Wrap with the Provider
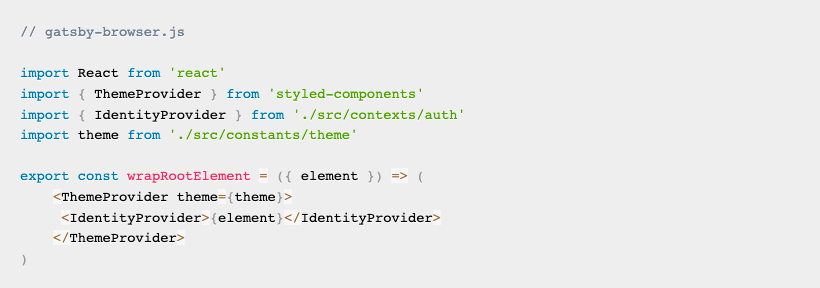
Unlike create-react-app application, Gatsby does not come with App.tsx file but we can wrap our CustomContext.Provider and ThemeProvider using wrapRootElement(). Then we export wrapRootElement() in both gatsby-browser.js and gatsby-ssr.js. Without wrapping the root element in both files there will be mismatch betwee client and server side output.
6. React.useContext hook to consume the context in any component
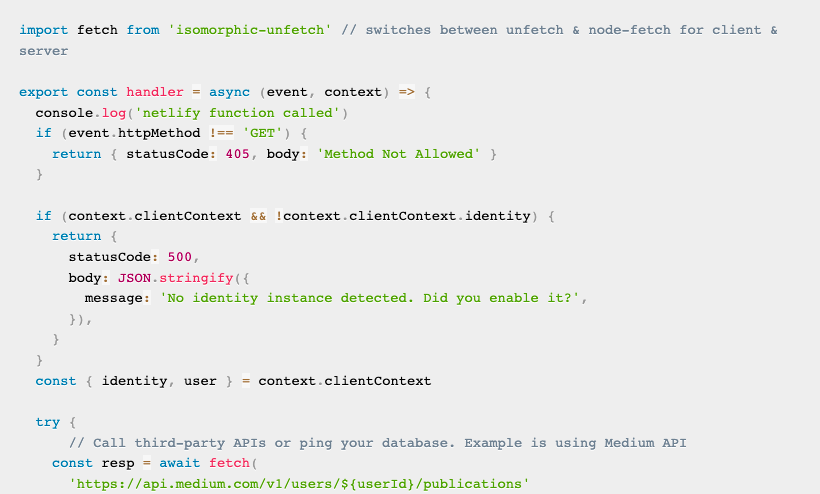
Use Authenticated Netlify Functions with Netlify Identity
Even though you can send along your Netlify Identity user id to your function's endpoint like in the body of a POST request, it is not completely safe from malicious attacks. A better approach would be sending the user's JWT access token in the request.
When Netlify Identity is enabled, Netlify serverless functions get access to the identity instance in the event
context object.1. In the front end, call your netlify function
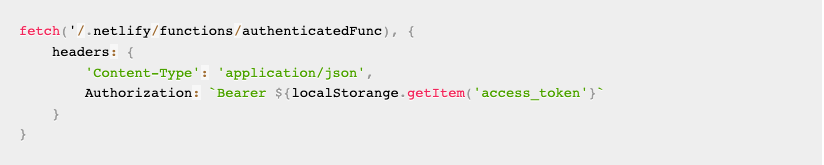
2. In your Netlify Function: the
user object is present if function request has Authorization header like below:Authorization: Bearer <access_token>